Setting up Arch for C development on a Mac
When I decided to set up an Linux environment for C development,
I wasn’t looking to abandon macOS entirely: believe it or not, I actually enjoy
working in Apple’s ecosystem. But I wanted a clean Linux environment to create an
ideal C workflow without cluttering my main machine. Most of all, I wanted to
use tools that were simply unavailable in MacOS, such as valgrind, and to use
gcc as my compiler without having to mess around with Xcode’s default LLVM
compiler.
Installing Arch
My first thought was to go native with Asahi Linux, since I had recently heard about the project and the idea of Linux directly on Apple Silicon was tempting. Unfortunately, my particular chipset isn’t supported yet, and waiting for official compatibility didn’t fit my timeline.
So, I turned to the reliable UTM, which is a light GUI on top of QEMU that could give me a sandboxed Arch setup while keeping macOS as my primary OS.
I chose to install Arch as my distro, mainly because it was lightweight, and
because I was most familiar with it. UTM is able to act as either a virtualizer,
or an emulator for other architecures such as x86, but for performance reasons
I opted for an aarch64 installation. For the installer image,
I turned to Archboot, which is supposedly compatible with:
“aarch64, Apple Mac M1 and higher for virtual machines”
To my surprise, unfortunately the VM failed to boot, supposedly with a problem
to mount rootfs:
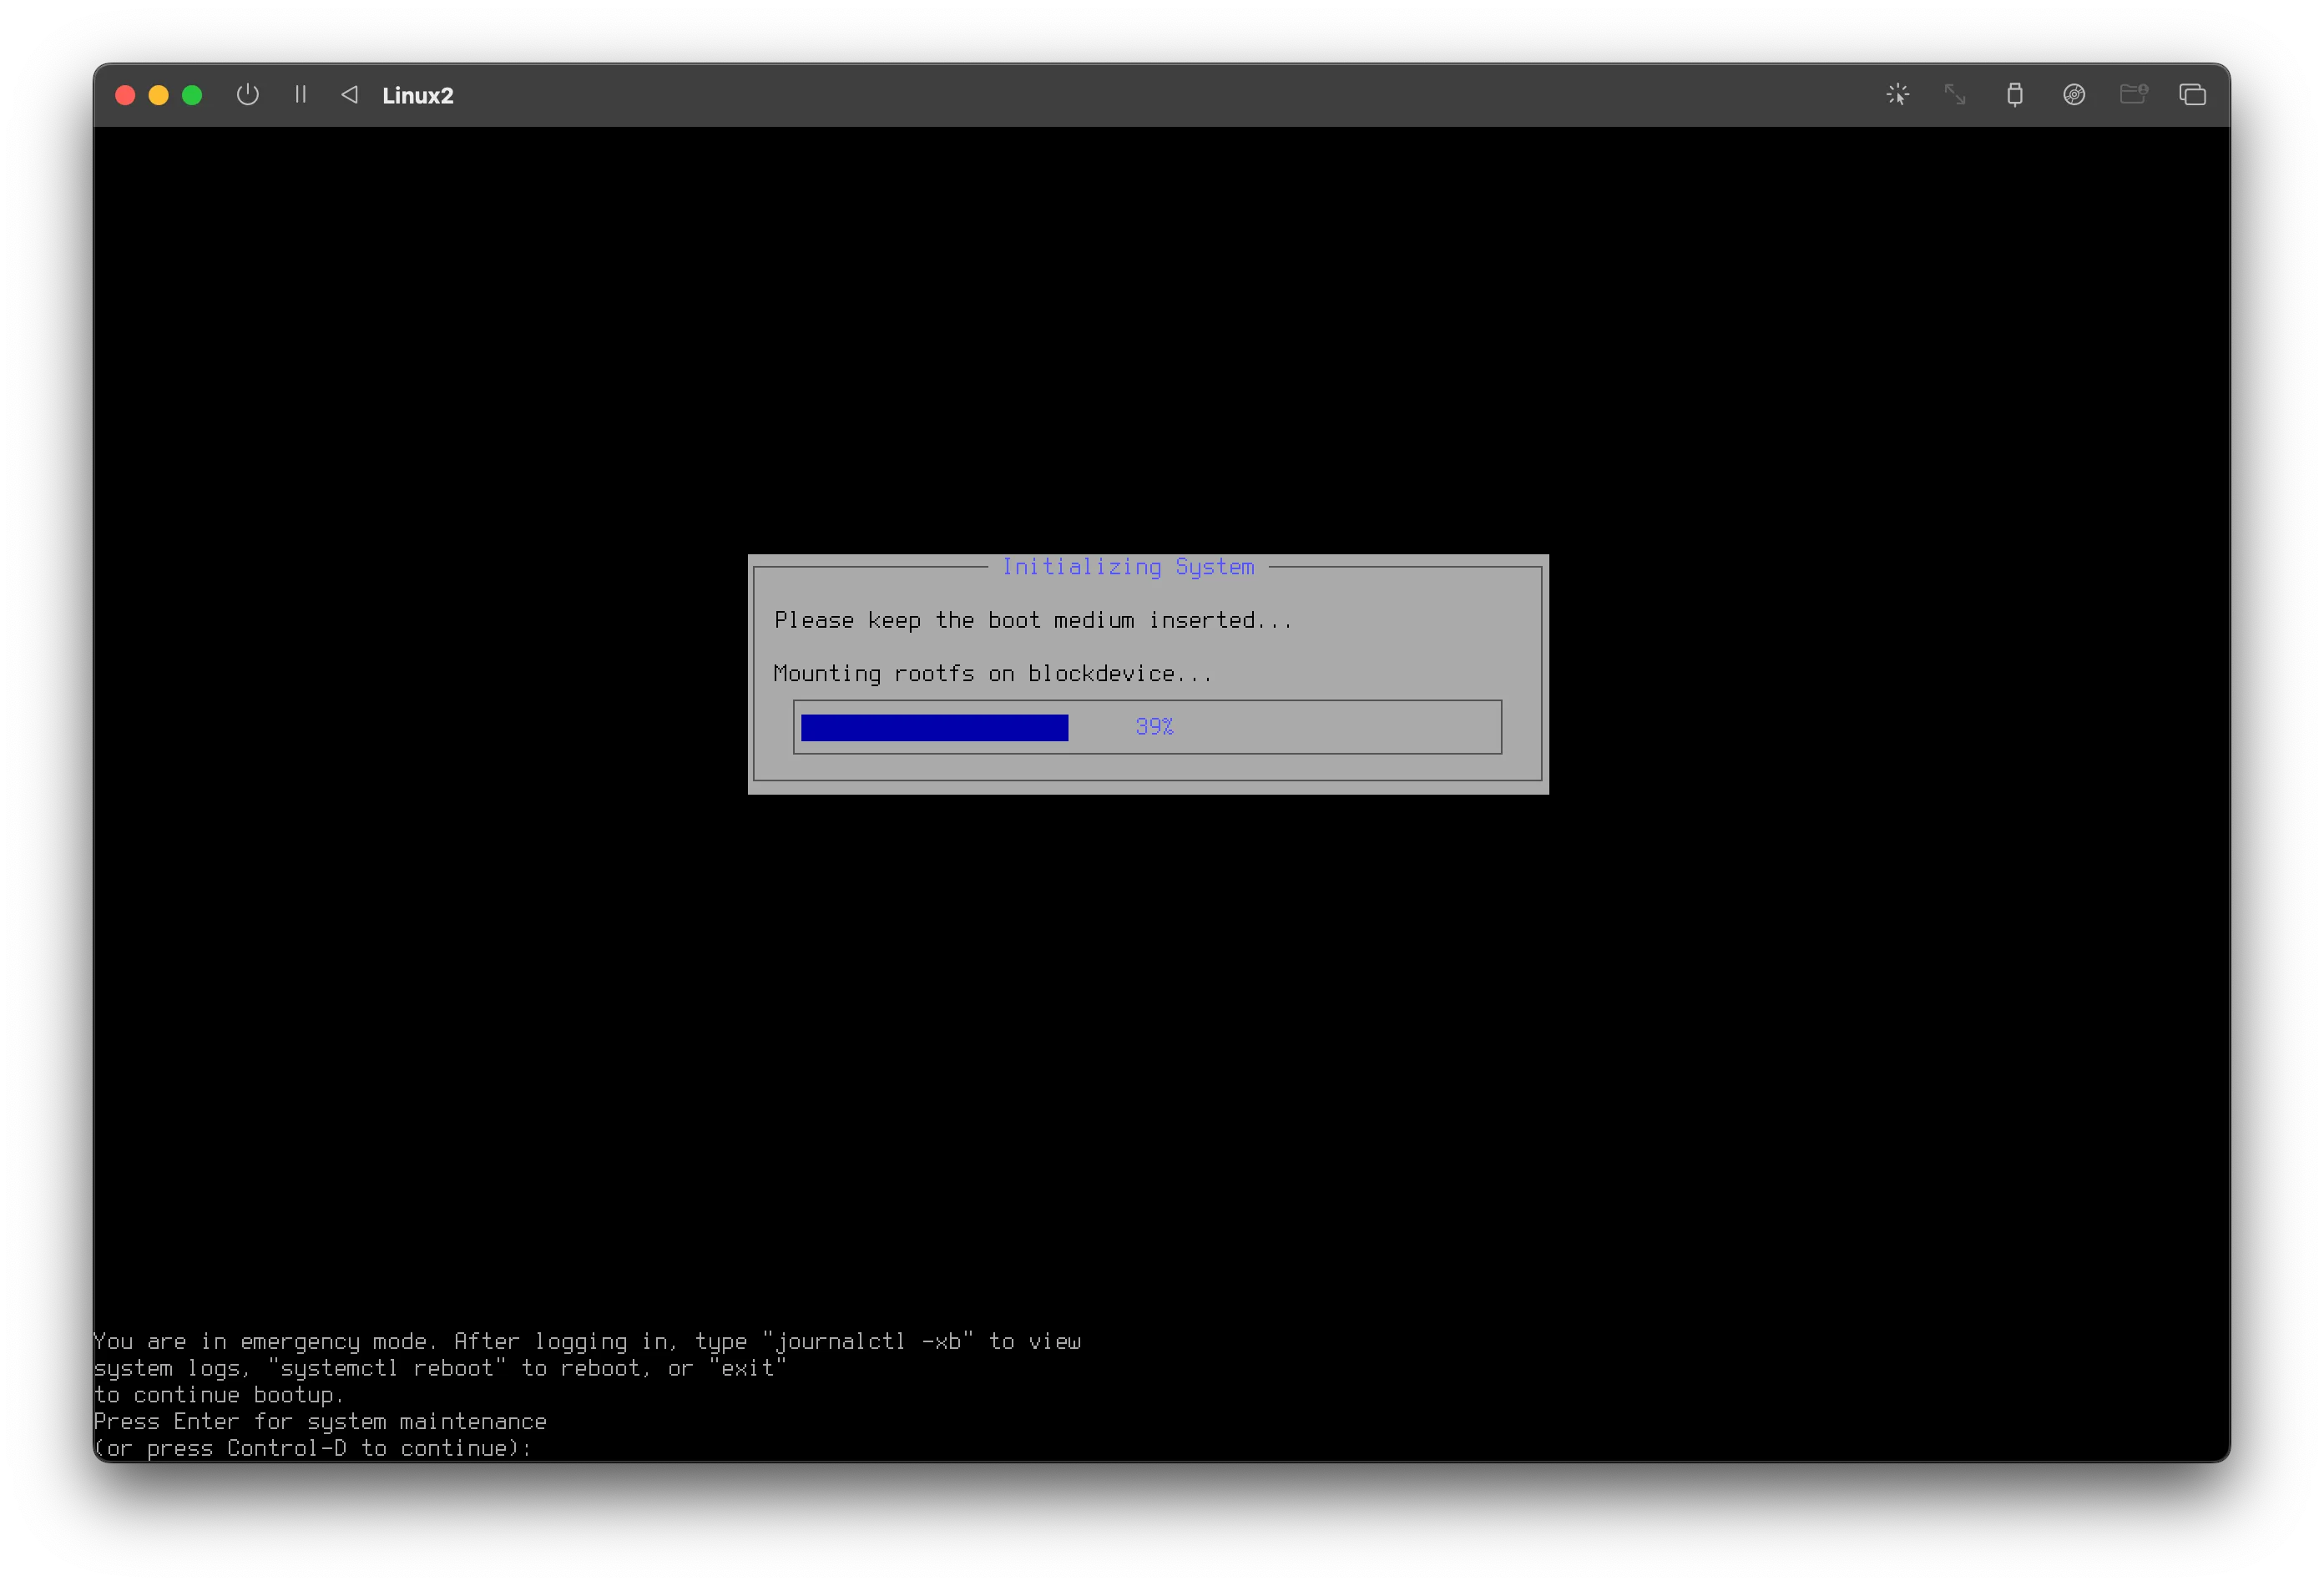
After spending a considerable time reading logs from journalctl, the issue
appeared to be a problem when initializing the emulated USB driver that contained
the installation medium. This meant that the ArchBoot GUI installer would crash,
leading me to the logged ISO.
Though it was possible that I might be able to manually mount the necessary devices & configure Arch from the command line, I felt that this would potentially lead to further problems and unwanted instability during the installation. Reading through more logs, it appears that the issue was related to the read-only setting of the USB device; however, we are unable to change this from UTM.
I figured that the best solution would be to just change the device emulation type to a CD Drive, as that emulated device would be very unlikely to fail, and was naturally read-only. Unfortunately UTM does not seem to expose this option any more. Thankfully, UTM is just a wrapper around QEMU, so we can just mess around with the command line arguments:
First, I changed the USB Drive interface from USB to None (Advanced) in
the UTM Settings, and then added the necessary QEMU flags:
-cdrom [path to your ISO]
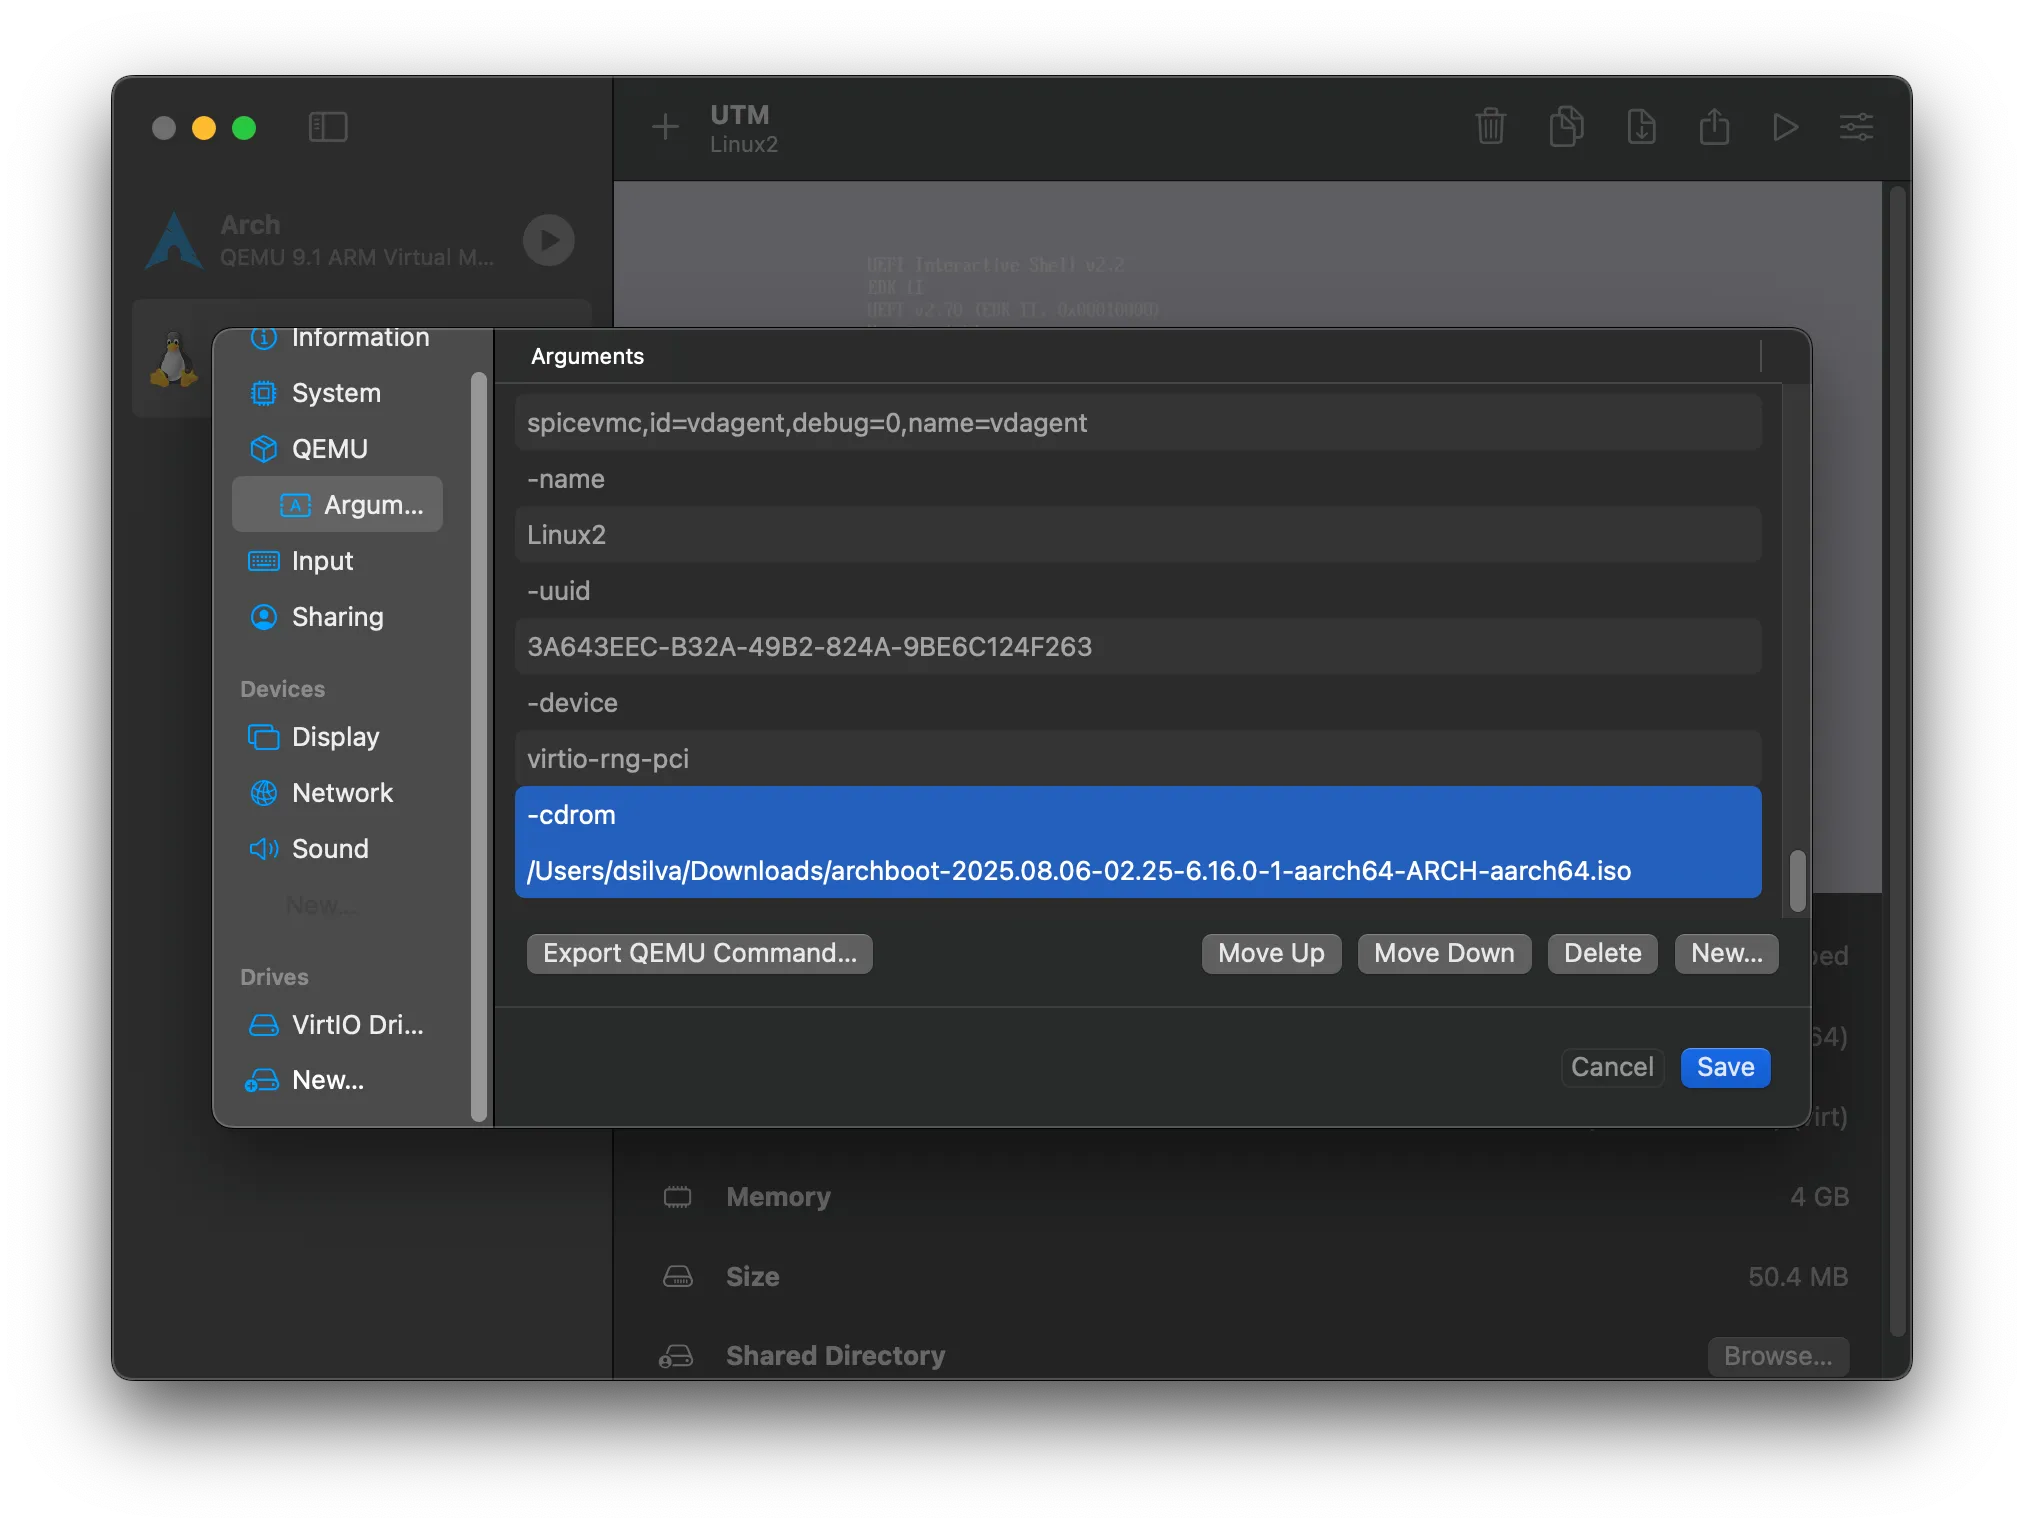
Then, going into the BIOS of the VM lets us select the new PCIe device — in my case UEFI Misc Device 3 and boot into GRUB. Finally, no more crashing! From here, installing Arch was a breeze, and setting up SSH was also easy following the OpenSSH guide.

It seemed like I had achieved the perfect setup — when idle, the QEMU proccess used a mere 10% of my CPU, less than WindowServer (!!) — and I had convenient access to a Linux environment.
Getting valgrind to work
Even with Arch running smoothly, I hit another roadblock: valgrind wouldn’t work
due to a lack of debug symbols:
Fatal error at startup: a function redirection
which is mandatory for this platform-tool combination
cannot be set up.  Details of the redirection are:

A must-be-redirected function
whose name matches the pattern:      strlen
in an object with soname matching:   ld-linux-aarch64.so.1
was not found whilst processing
symbols from the object with soname: ld-linux-aarch64.so.1
A suggested short-term fix was to install glibc-debuginfo, but this package is
only available on Debian. On Arch, the closest alternative is the debuginfod
package. Unfortunately, even after installing it, the debug symbols couldn’t be
retrieved—likely due to the aarch64 architecture, for which no prebuilt symbols
appear to be available.
Building glibc from source
So, my only other alternative was to build glibc from source, maintaining
the debug symbols. However, this is a delicate process because the GNU C Library
is a core component of your system. Installing it incorrectly can potentially
break your entire Linux installation. For this reason, it’s crucial to install
it into a custom directory, rather than overwriting the system glibc.
First, find your current version of glibc, and make sure that you download
the same release from the source.
$ ldd --version # Find your current version of glibcNext, download the source to that version, in my case, glibc-2.41. For a faster
download, a list of FTP mirrors that may be closer to you
on the Free Software Foundation’s website:
$ wget http://ftp.gnu.org/gnu/libc/glibc-2.41.tar.gz
$ tar -xvf glibc-2.41.tar.gz
$ cd glibc-2.41
We want to compile the library with full debugging information so valgrind
can analyze programs properly. We include the following CFLAGS for debug support:
-g, which includes debug symbols in the compiled binaries-fvisibility=default, which ensures that all symbols exported are visible
$ mkdir build && cd build
$ ../configure --prefix=/usr CFLAGS="-g -O2 -fvisibility=default"
$ make -j$(nproc)
Once compilation is complete, create a custom installation path and install.
It is essential that you specify a DESTDIR location here, as to not mess up
your included glibc.
$ sudo mkdir /opt/glibc-debug
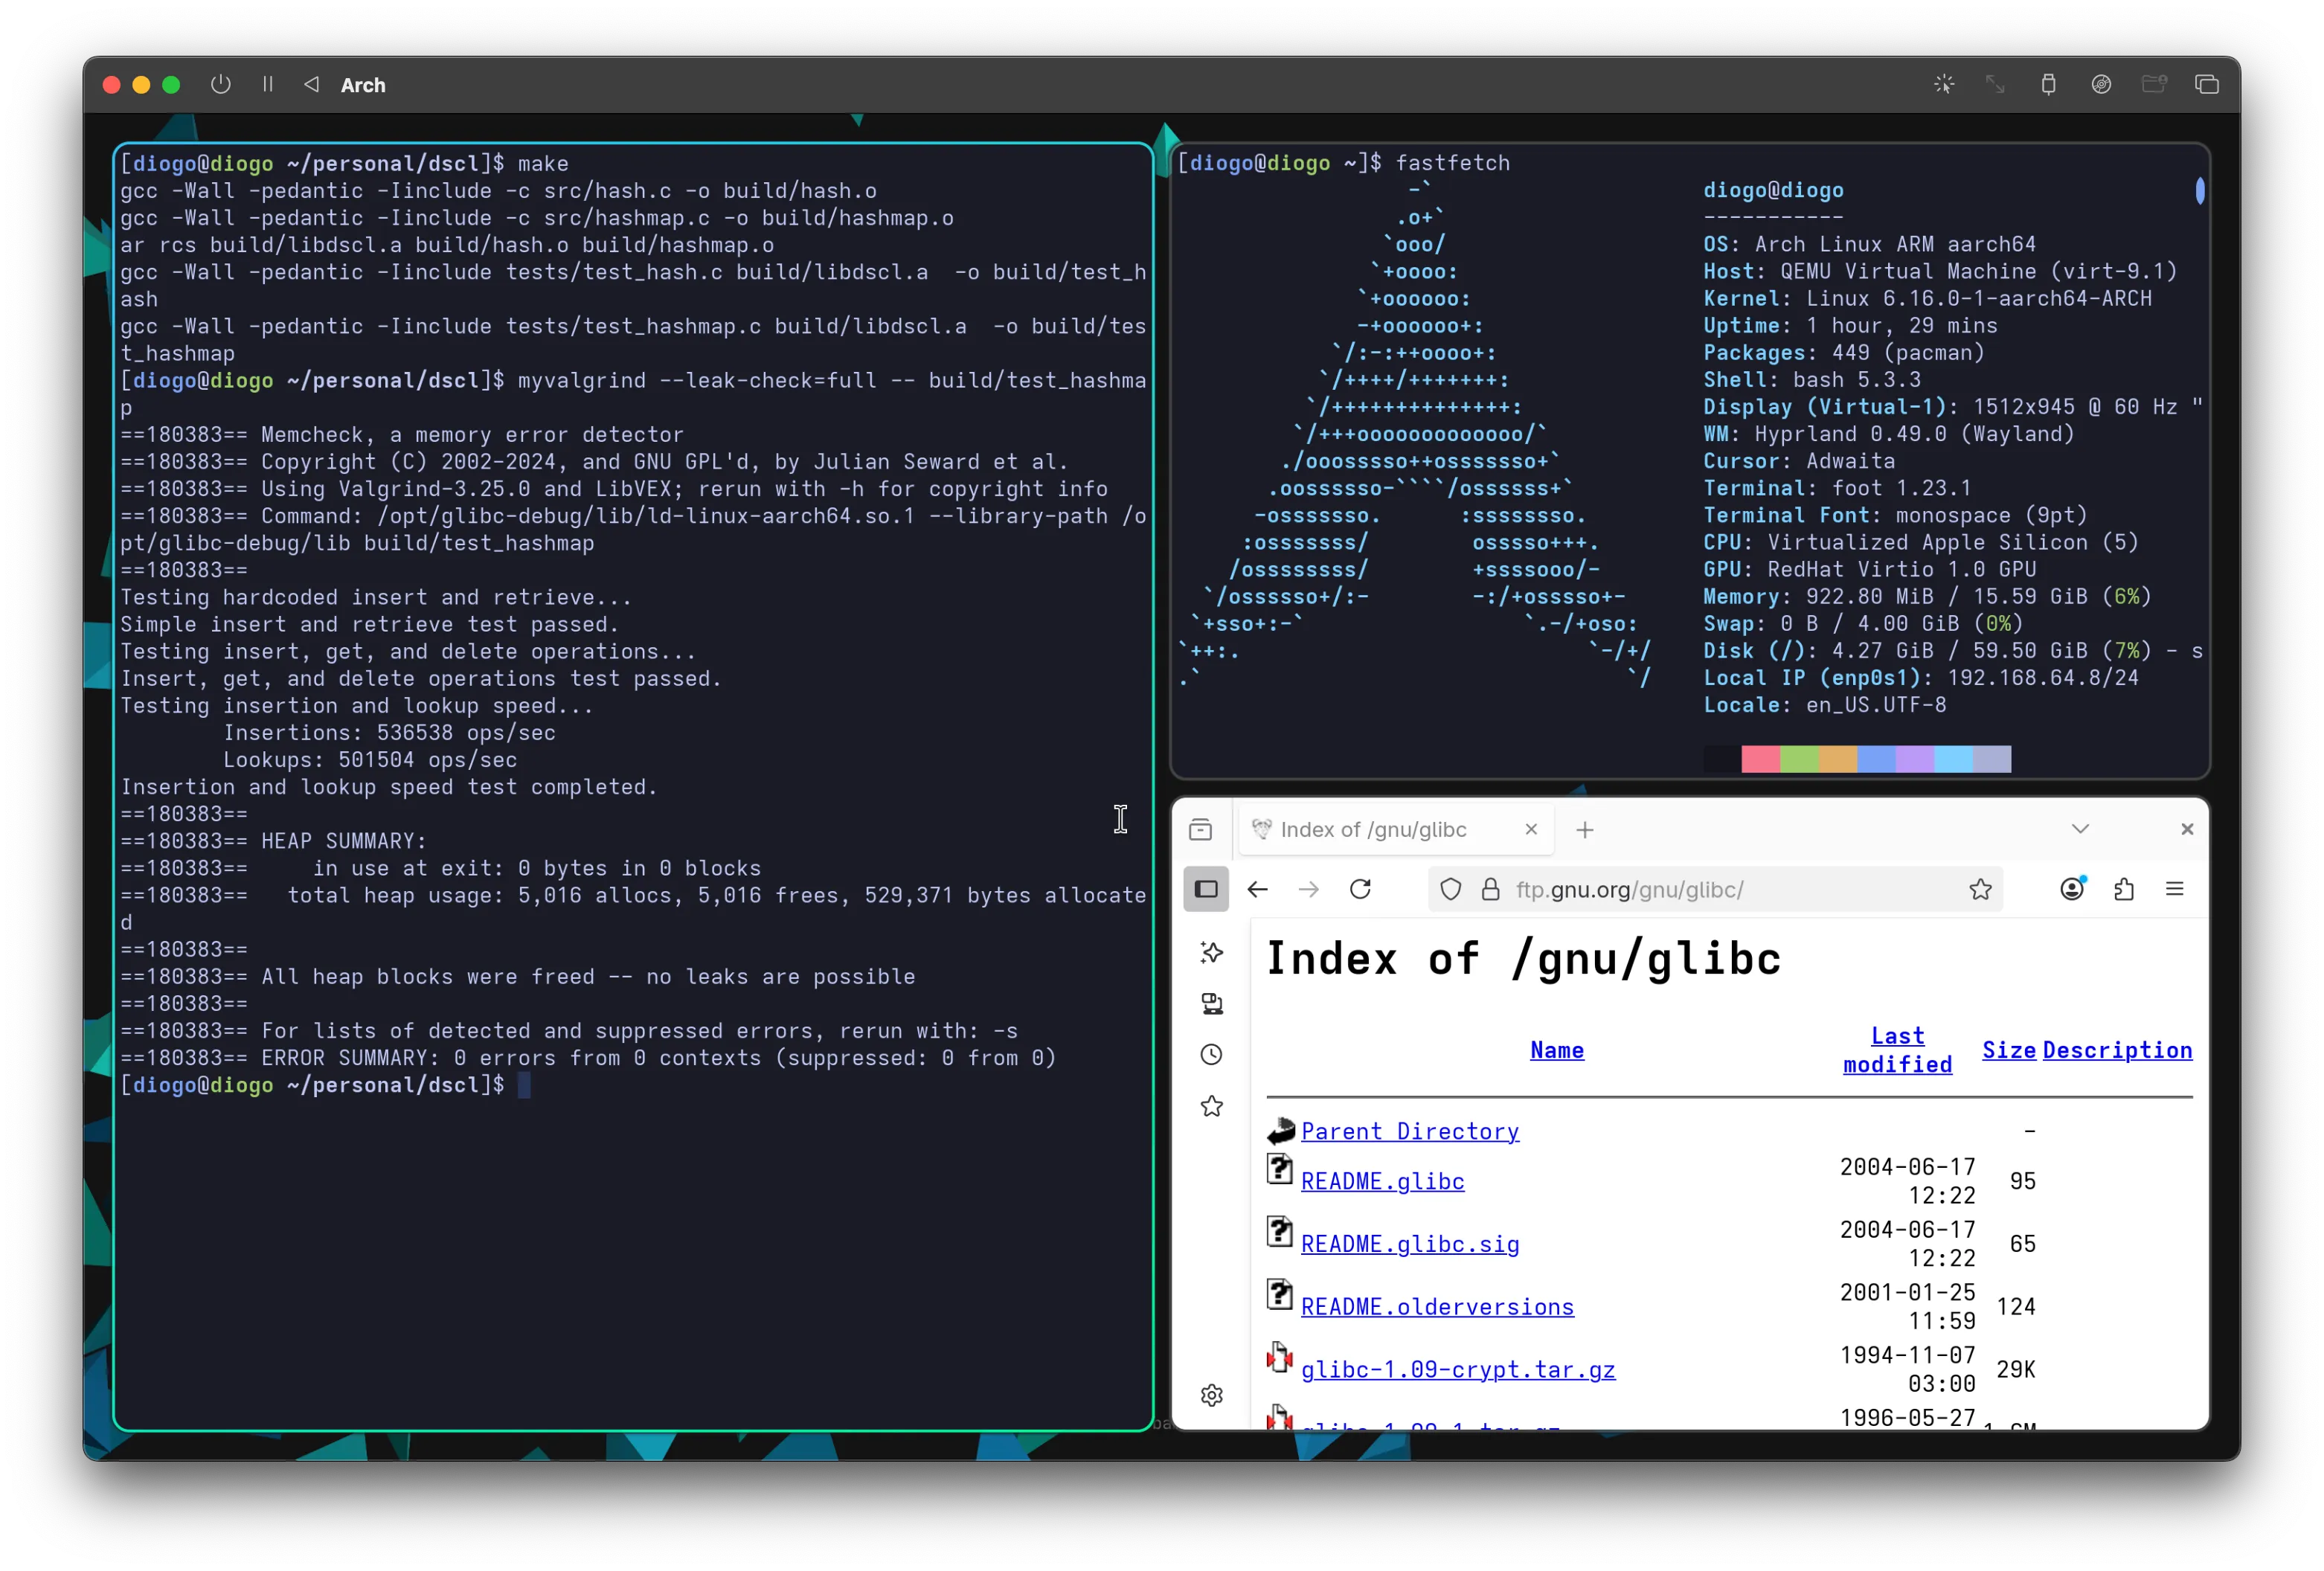
$ sudo make install DESTDIR=/opt/glibc-debugWith the full debug symbols available, it is now possible to successfully
run valgrind on the desired program paths, though by specifically including
the debug libraries built for glibc:
valgrind /opt/glibc-debug/lib/ld-linux-aarch64.so.1 --library-path /opt/glibc-debug/lib $PROGRAM_PATHAnd, with that, we have valgrind fully running:
Convenience
Unfortunately, remembering and typing out this full command is
not very easy. So, with the help of ✨ AI ✨, I created a small helper script
that wraps the long command and lets you run valgrind with your debug-enabled
glibc:
Simple chmod +x and add the script to your $PATH, and you’re good to go.
Conclusions
In the end, the process reinforced just how much flexibility and control Linux offers—even when running in a virtualized environment on macOS. Working through compatibility quirks and toolchain limitations was a little tedious, but left me with a much better understanding of the inner workings of my machine.
It also highlighted the value of tailoring a development environment to fit your exact needs rather than compromising with “good enough.” The final setup may have taken more effort than a pre-packaged solution, but the payoff is a workspace that feels fast, capable, and entirely my own.
I also installed (and extensively troubleshooted) hyprland, because of, well,
the hype around it, and will likely be sharing my thoughts about it in a future post!